Configuring MAPI Email in Microsoft Outlook
This article shows you how to setup Microsoft Outlook to work with your Web Wiz email account using MAPI. MAPI gives Outlook a native, Exchange-style connection that syncs your email, calendar, contacts, tasks and notes. It is available in classic Microsoft Outlook for Windows (2016, 2019, 2021 and the Microsoft 365 desktop app) – the new Outlook for Windows does not support MAPI, so use IMAP instead.
1. In Microsoft Outlook, from the File menu, select Add Account.
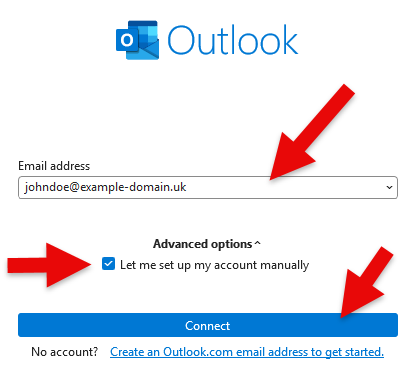
2. On the Email Address window enter your Email Address, then check Let me set up my account manually, and then click Connect.
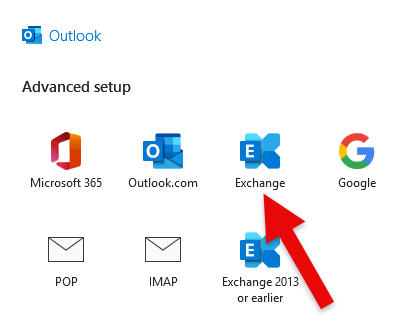
3. For the Choose Service click Exchange.
Important: Select Exchange – do not select Microsoft 365 (it may be highlighted by default). The Microsoft 365 option will not connect to a Web Wiz mailbox.
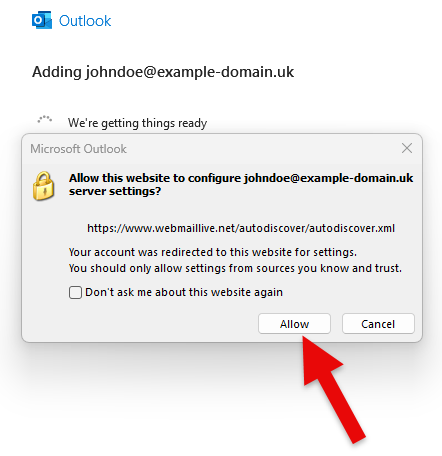
4. Outlook will now locate your mailbox settings automatically using Autodiscover. If you are shown a certificate prompt, click Allow to accept it.
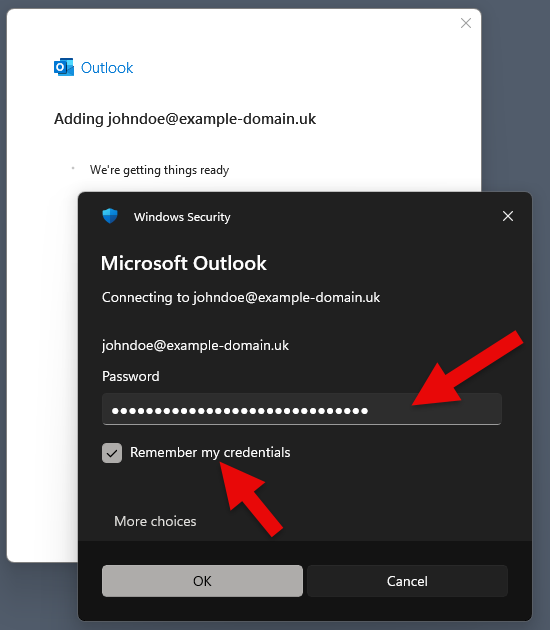
5. When the Windows Security window appears, enter your information as follows, tick Remember my credentials, and then click OK.
- User name
- Your complete email address, such as account@example.com
- Password
- As you have specified in your Control Panel for the email address
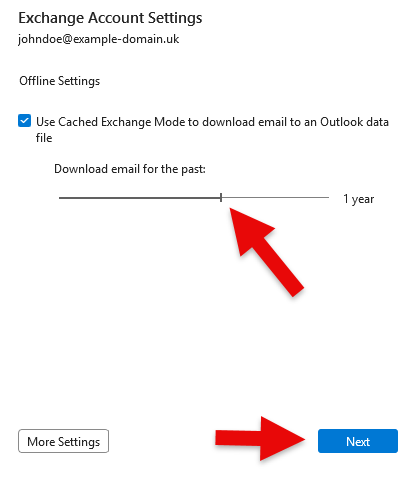
6. Choose how far back you would like Outlook to sync your mail, then click Next.
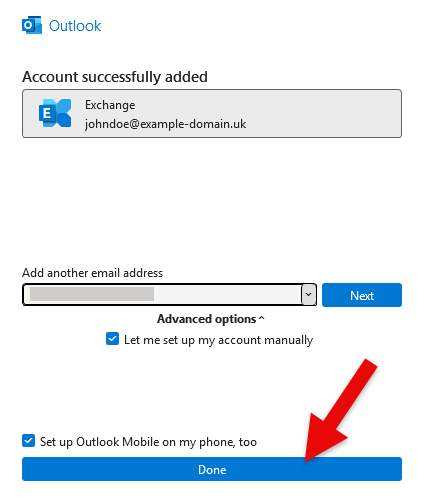
7. Click Done. Outlook will open and begin syncing your email, calendar, contacts, tasks and notes.
Reference – underlying connection settings
These values are configured automatically by Autodiscover and are provided for reference and troubleshooting only.
- Account Type
- Exchange
- Server
- mail.WebSiteLive.net
- Autodiscover Host
- autodiscover.WebSiteLive.net
Web Wiz do not endorse or directly support third-party products and only give this information as a guideline for our customers mailboxes hosted on our servers.
Back To Hosting Knowledgebase Menu |